Making a Portfolio with Next.js | One-Click Deployment

1. Let's Get Your Website Online
In the previous article, we learned what websites are made of and how the web works. Now it's time to put those ideas into practice.
Our goal is simple: get a working portfolio website online that you can open in your browser and share with others.
We'll use portfolio-template, a ready-made Next.js website with a homepage, an About page, and sample projects. The layout and code are already prepared, so you don't need to write any code to follow this part.
To publish it, we'll use Vercel, a platform that hosts websites. Putting your website online is called deployment. Vercel takes the template's code, prepares it to run, and makes the website available on the Internet.
Why Don't We Use Codex Sites?
Tools such as Codex Sites bring website creation and hosting together, which can make getting online convenient.
But one goal of this series is to help you build a website that isn't tied to one particular platform or tool. We want you to understand where your files are, how to change them, and how to publish them, so you can choose different tools as your needs change.
Our template is a Next.js project whose code, content, and images you can keep on your own computer. We'll store a copy on GitHub and use Vercel for our first deployment. Later, you can use another code editor, work with or without an AI assistant, or move the project to another host that supports Next.js. Moving hosts may require some setup, but you'll have the files you need.
Vercel is our starting point, rather than a requirement for the lifetime of your website. The same principle applies to GitHub and tools such as Codex Sites: you should be able to keep working on your website even if you decide to change tools.
The template includes a Deploy with Vercel button to start this process. This is often called one-click deployment: the button handles much of the setup, although you'll still need to sign in and choose a name for your copy.
For now, we'll keep the sample content and use the website address Vercel provides, ending in .vercel.app. This domain is provided for free by Vercel, it is well enough for our very first deployment, but we do not recommend using it for a long-term portfolio or personal website.
After our initial deployment, your address might look like my-first-portfolio.vercel.app, though your actual address may be different. Vercel assigns this address automatically.
We'll cover adding your own domain and changing the text, images, and projects in later articles. Let's start by getting the template running.
2. What You'll Need
You can do everything in this part through your browser. You'll need two accounts:
- GitHub stores your own copy of the website's files. A collection of files like this is called a repository.
- Vercel hosts the website so people can visit it.
If you already have these accounts, sign in. Otherwise, create them first. When setting up Vercel, you can choose to register with GitHub (recommand, as you will need to link two accounts together) and follow the prompts to connect your account.
3. Open the Deployment Page
Open the template on GitHub and click Deploy with Vercel near the top of its README, the introduction below the file list.
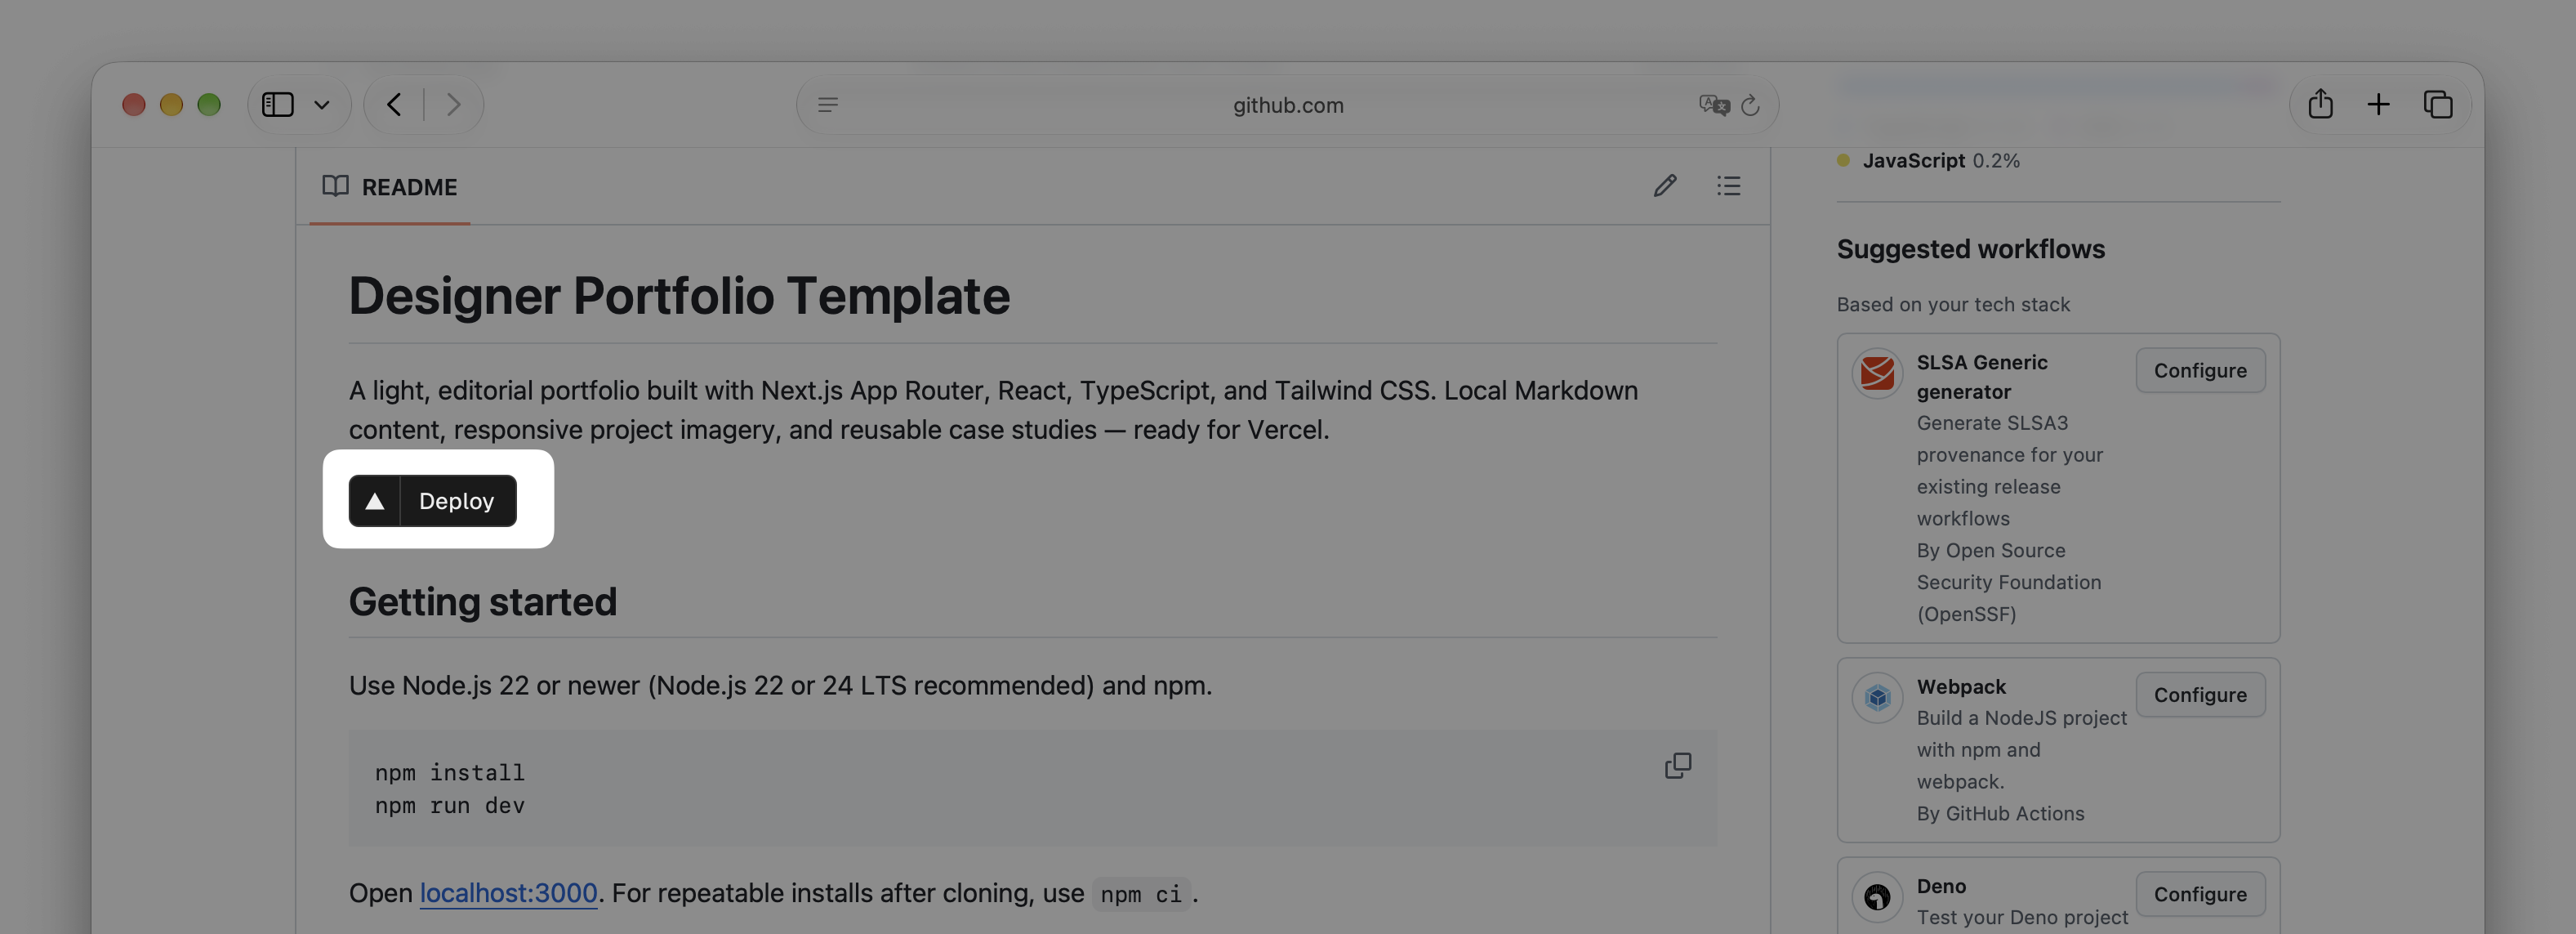
You can also use this link directly:
After signing in and connecting GitHub if prompted, you'll see a New Project page like this:
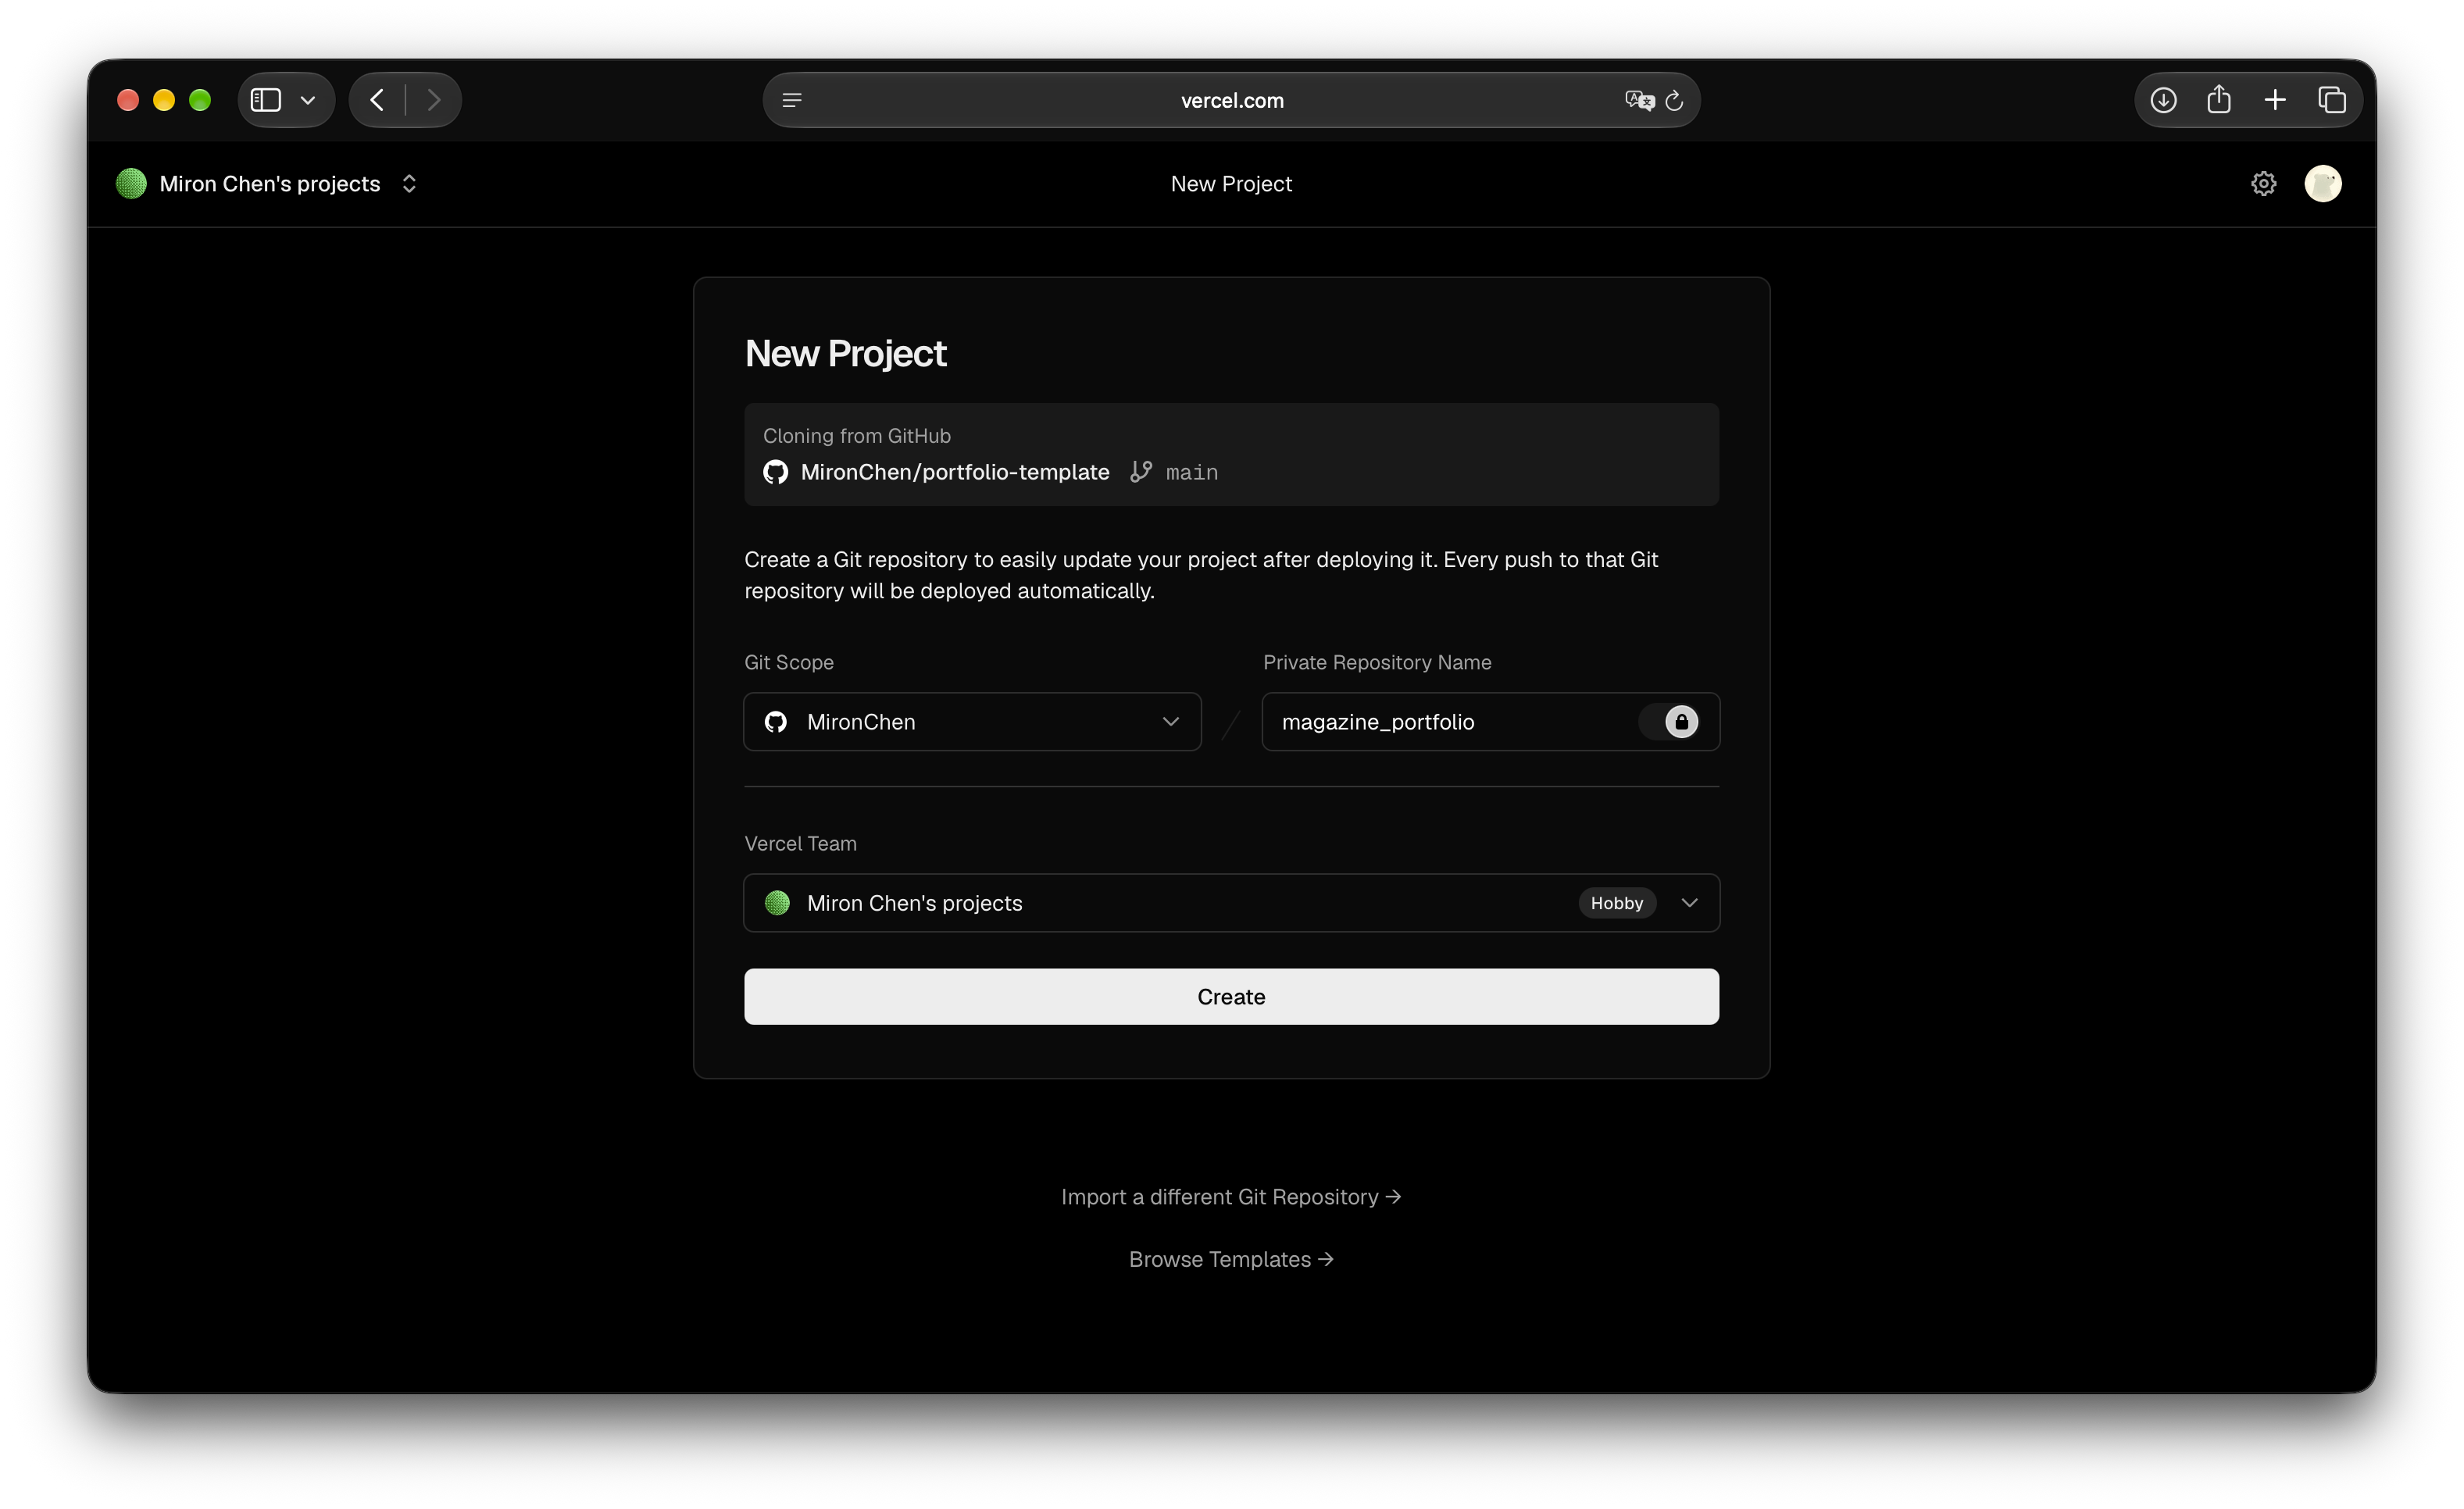
Check that the template shown under Cloning from GitHub section is MironChen/portfolio-template.
Choose your GitHub account (your account name in Git Scope will be different from the one in the screenshot.) under Git Scope, then enter a name such as my-portfolio under Private Repository Name. This names your own copy of the template on GitHub. Under Vercel Team, select the account or team where you want to host it.
4. Create Your Website
With your account selected and a repository name entered, your page should look something like this:
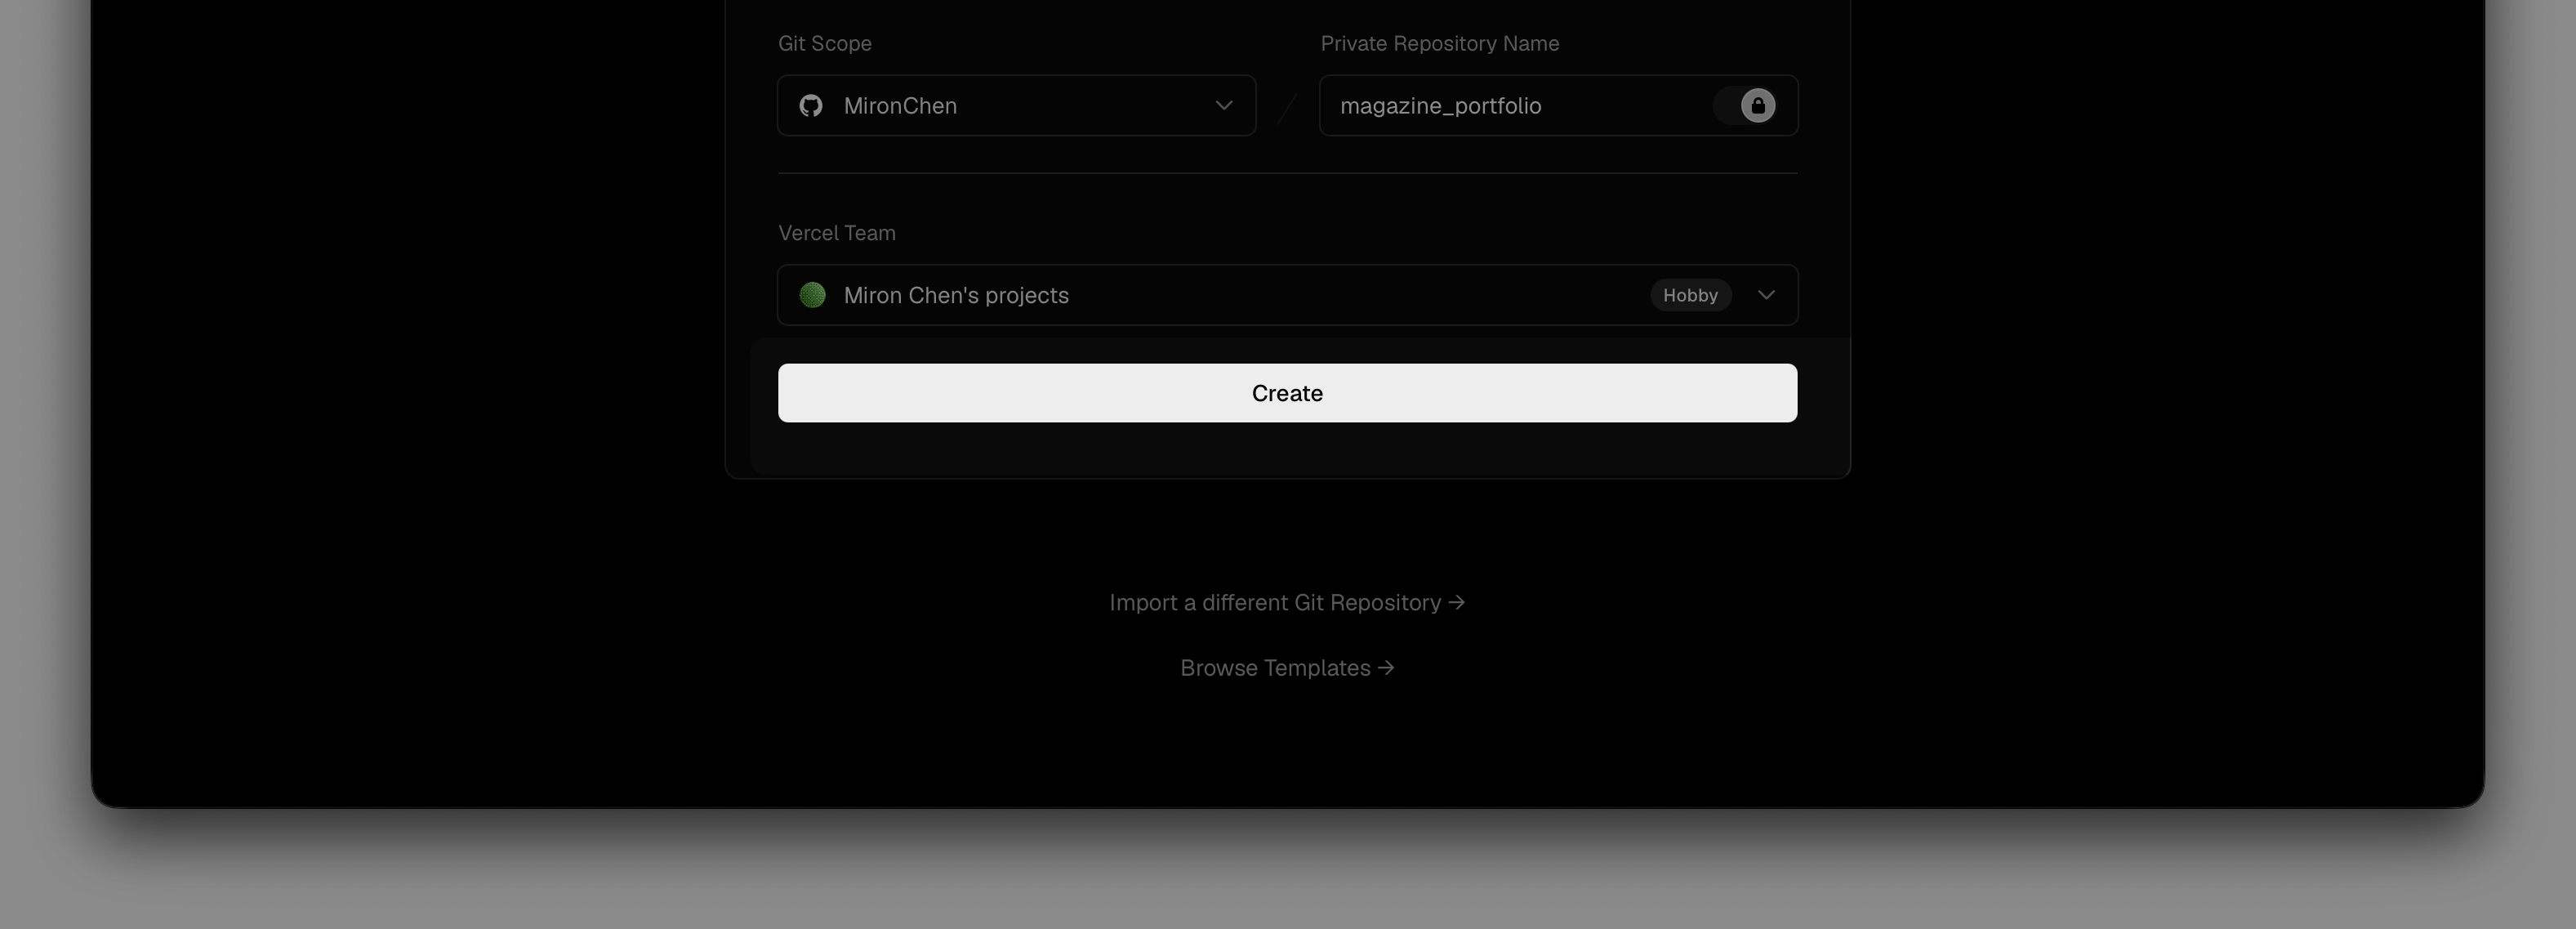
Click the large Create button.
Vercel will create your own copy of the template on GitHub and start deploying it. During this process, it downloads the tools the website needs and builds the pages. A build simply prepares the code for visitors to use.
Keep the page open while Vercel works. You may see progress messages or lines of technical text. You don't need to understand every line; for now, just wait for the deployment to finish.
When it finishes successfully, you'll see Congratulations! and a preview of your website:
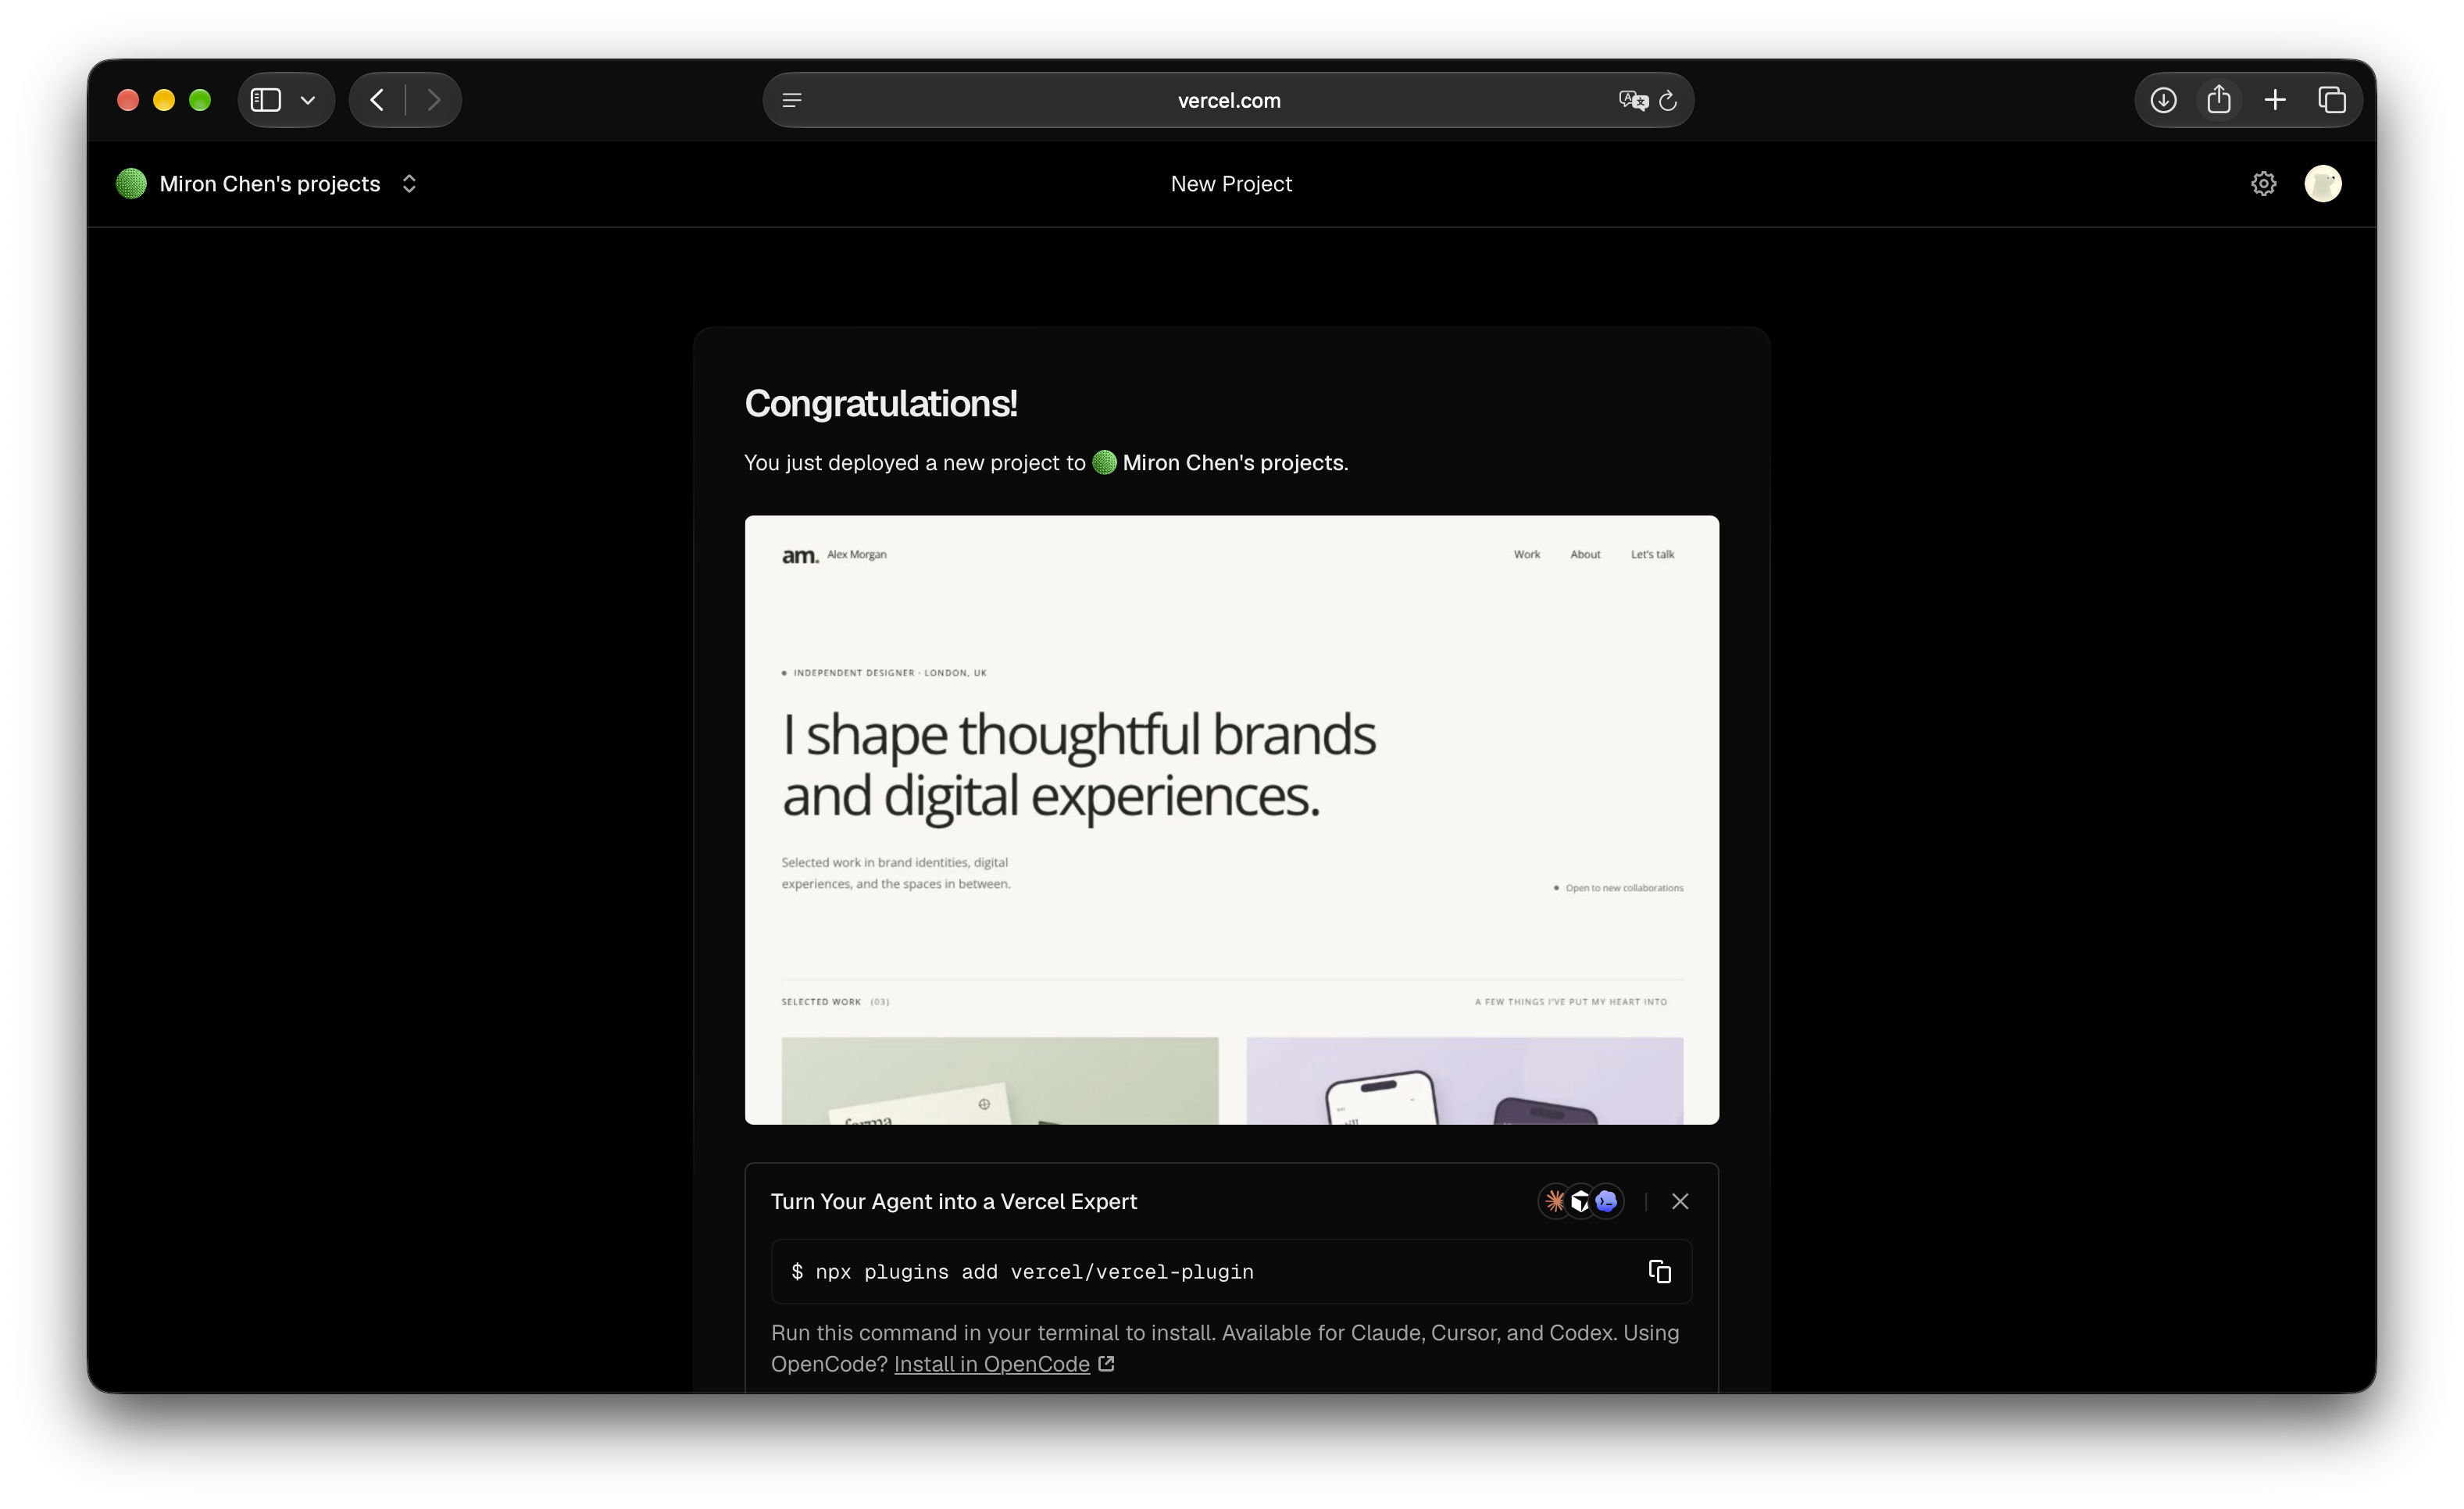
That's your first deployment complete!
If the deployment fails instead, open the build logs—the messages recorded during the build—and look for the error. Save that message if you need help figuring out what went wrong.
5. Open Your Website
Next, open your project's dashboard in Vercel. If you're still on the success page, look for the option to continue to the dashboard. You can also go to Vercel, find the project you just created, and open it.
On the Overview page, you'll see a Production Deployment section. Production means the version intended for your visitors.
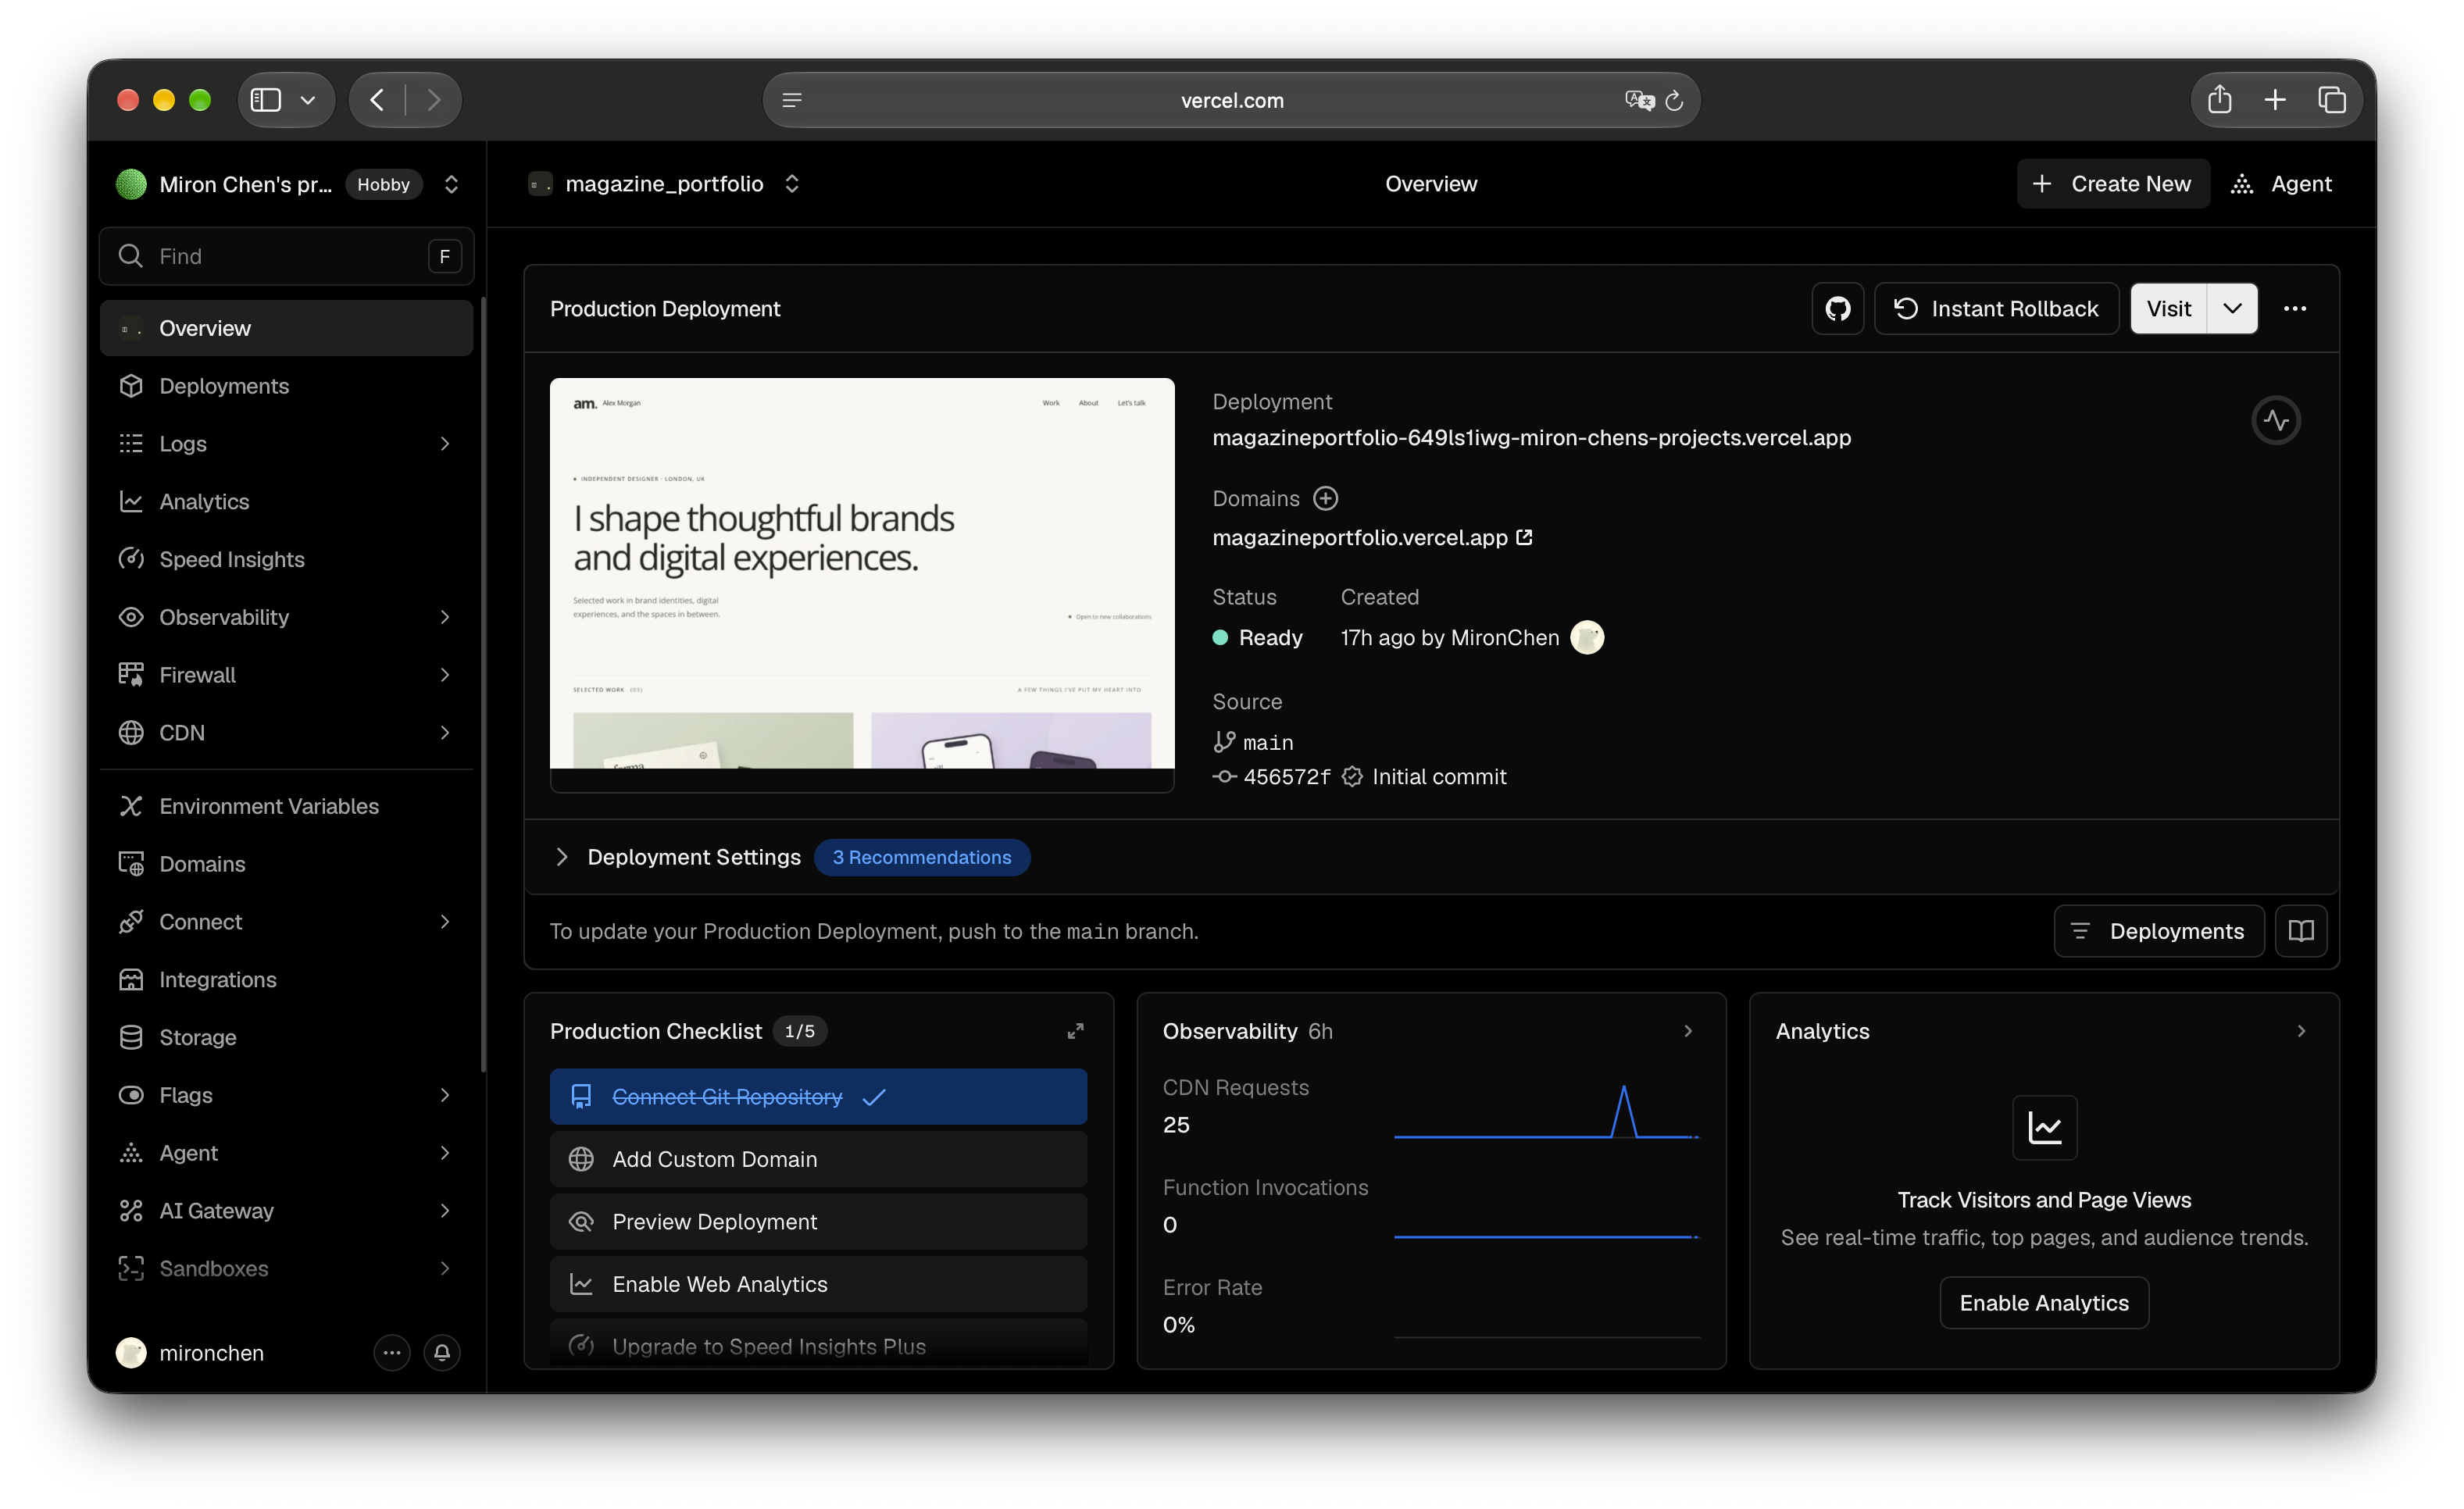
Check that the status says Ready, then click Visit in the top-right corner of this section to open your website.
You should now see the template's homepage in your browser. Try opening About and clicking a project to see its page. The name and projects are still the template's examples; we'll replace them with your own content later.
Find the Address to Share
Back on the Overview page, look under Domains. You'll find an address ending in .vercel.app. Copy that address and add https:// if needed when sharing it.
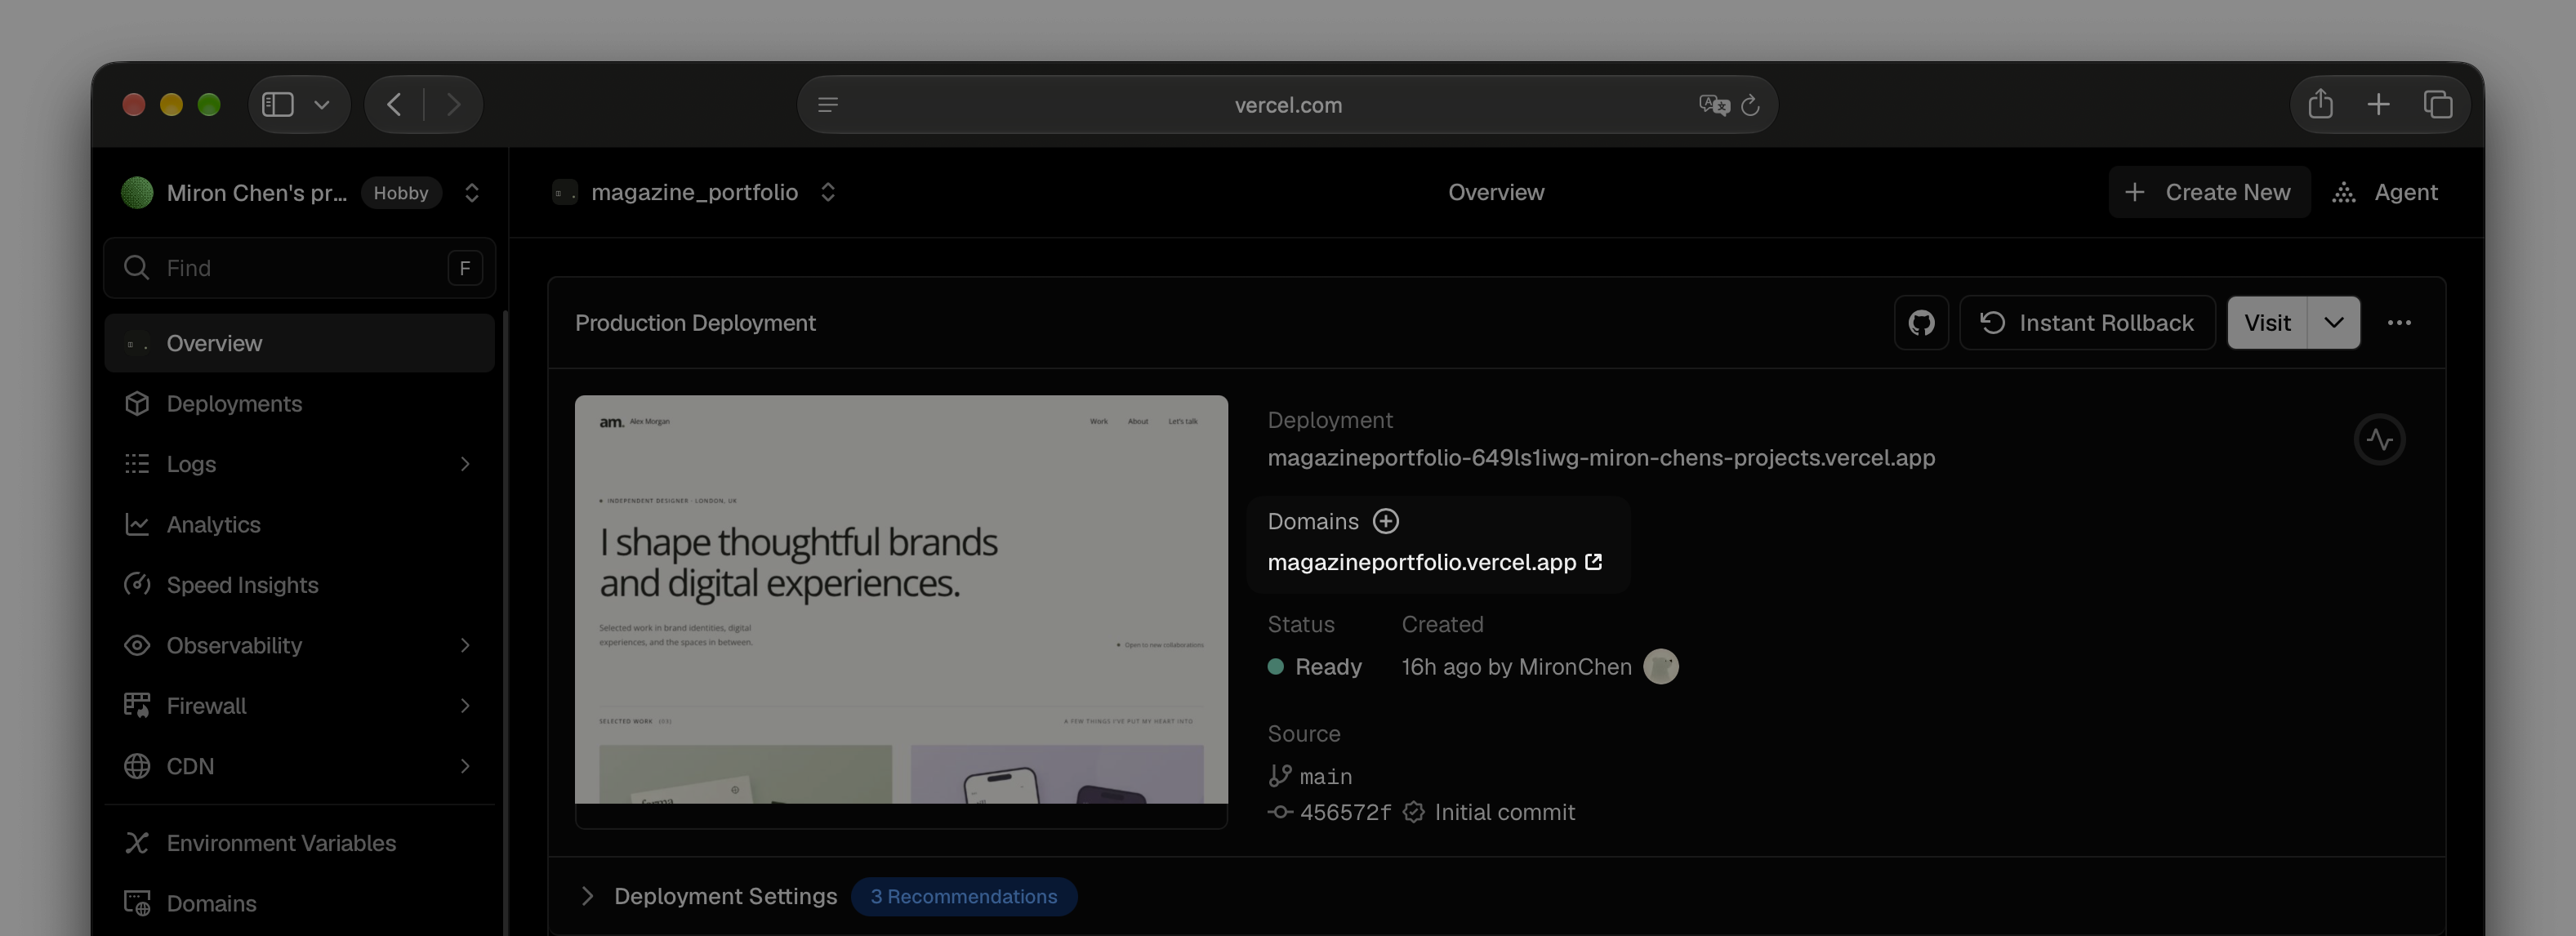
You may also notice a longer address under Deployment. That points to this particular deployment. For your portfolio, use the production address under Domains, which can continue to show the current published version as you update the site. Vercel's URL guide explains the different addresses.
Before sharing, try opening your production address in a private or incognito browser window. If the website loads without asking you to sign in to Vercel, visitors can open it too.
Special note for Mainland China
If you are currently in Mainland China or you wish to share your website to visitors within Mainland China region, you might experience issues accessing the `xxx.vercel.app` domain.
Due to regulation and network restrictions, Vercel's servers may be blocked or slowed down in Mainland China. A customised domain might mitgate this issue. We will talk about how to set up a custom domain in the next article.
For more details, please refer to Vercel's guide on accessing Vercel-hosted sites from mainland China.
What's Next?
You've taken a ready-made template and published a working website. GitHub holds your copy of the files, and Vercel hosts the website at its .vercel.app address.
You can keep using that address for now. There's no need to buy a domain to finish this section.
Don't worry if you don't understand all the details yet. The goal of this part is to get a working website online, and you've accomplished that!
In the following articles, we'll make the portfolio yours: change the name and introduction, add your projects and images, and connect a custom domain. And more importantly, how to understand and maintain your website so you can keep it running for years to come.
For now, bookmark your website and its Vercel dashboard. We'll return to them when we start customising it.
If you have any question, feel free to leave a comment below :)
Comments
A thought, a question, or a different perspective — you're welcome to share.
Loading comments…